Client Users: Quick guide
After registration with your valid Facebook or Gmail account, the welcome screen will open.
Home
In this tab, we will configure the business data. It is important to note that the data provided in this space will be what your potential My Favorite Shop user customers will see when they use the app in the CLIENT way.
1.1 Home tab
If this is the first time you are using the ‘Client’ version of the app, it will ask you to enter a valid contact phone number and grant location permissions, which are necessary conditions for the app to work.
1.1.1 Personal data/ fiscal data tab
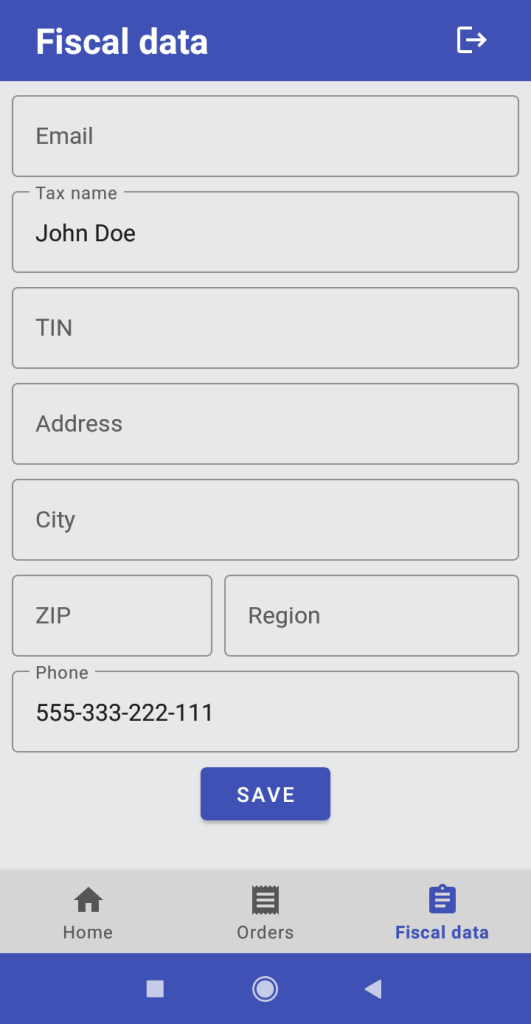
The app will take you to the ‘Fiscal Data’ screen. Please fill in all the fields if you want to receive invoices automatically, or at least fill in the mandatory phone field.


1.1.2 Allow location permissions
Once you have filled your personal data and back to “Home” tab, tap in “Nearby businesses” button and again, if it is the first time you are using the app, it will ask you to activate the location permissions. They are necessary and the app will not provide any functionality without them.


1.2 Nearby businesses in your area
Once granted, we will see if we have My Favorite Shop user businesses within a 5 km radius of our current location.
If so, we can select from the markers and access the catalog of products shared by that business.
Select, press “Accept” and the app will send you back to Home tab.
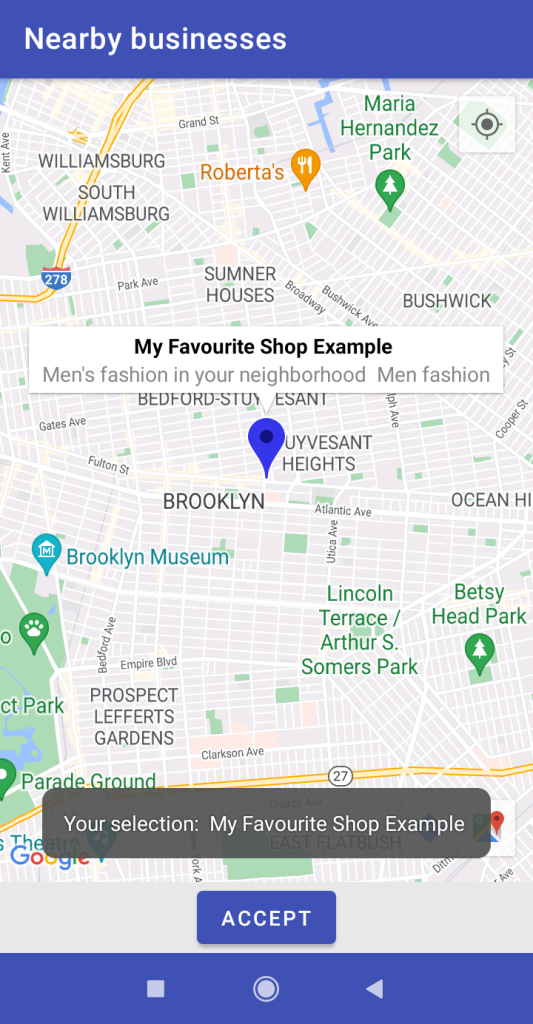
But now, in Home tab, the logo of the selected store, the category or occupation of this business and its physical address will appear, as well as the “View catalog of…” button.
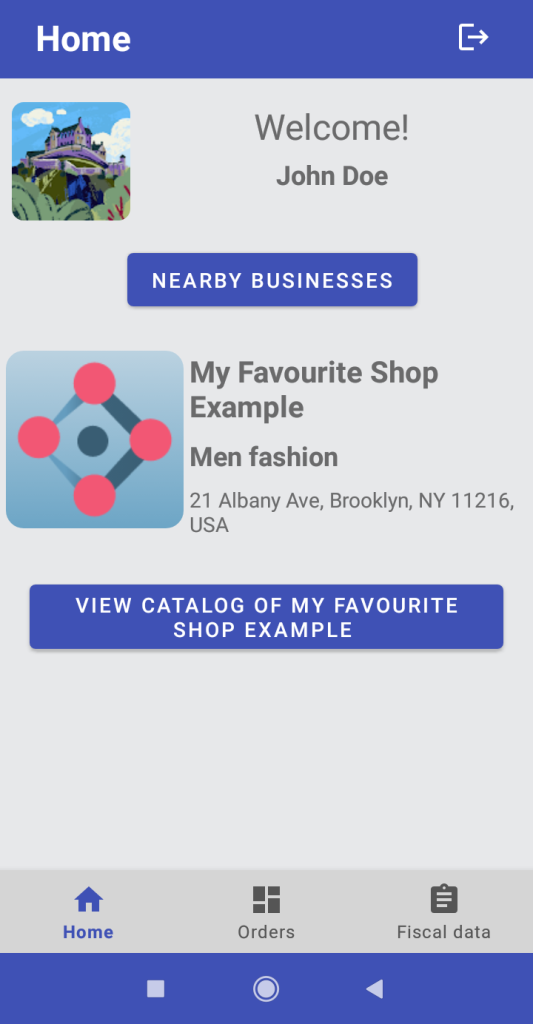
1.3 Access to the virtual screen catalog
Press the button and we will access the catalog shared by the selected business.
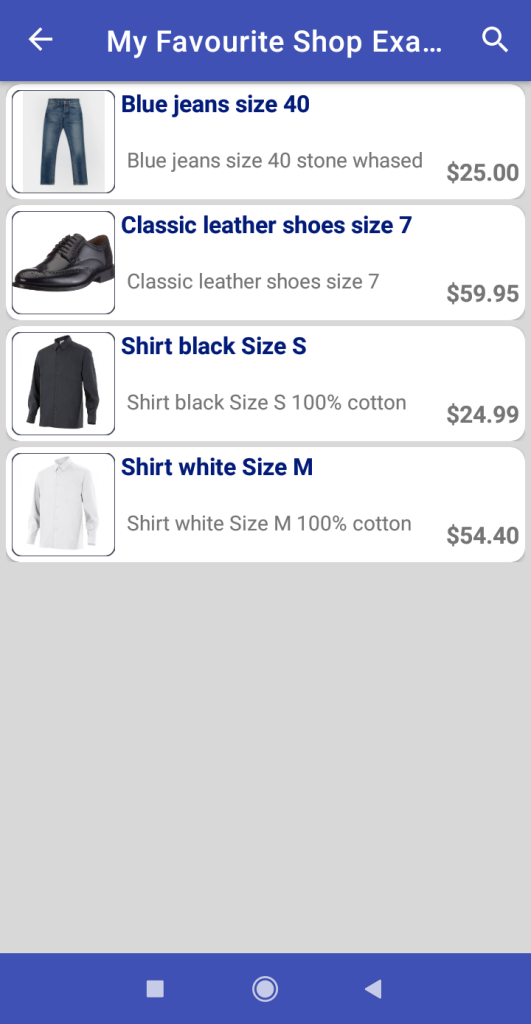
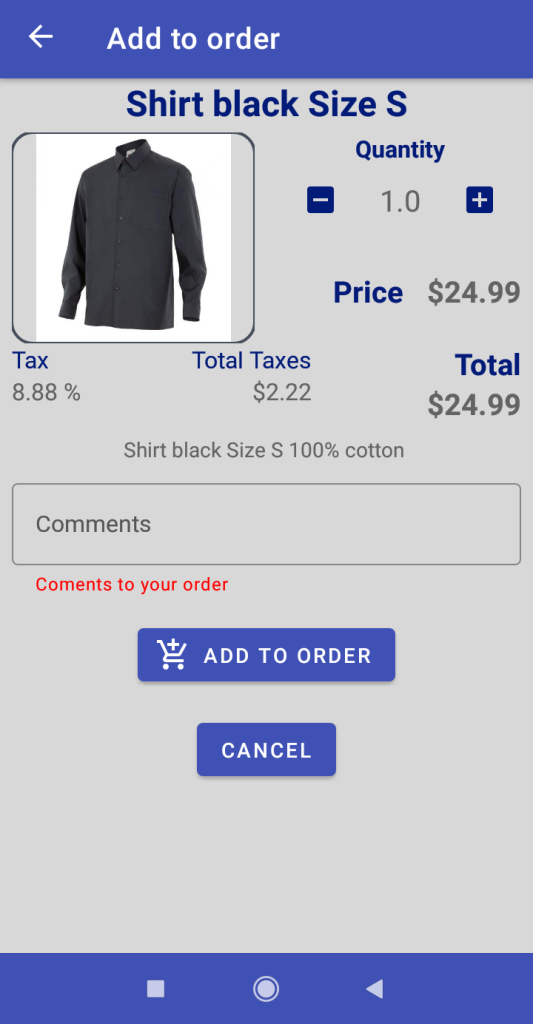
Click on any item on the list and a more detailed description of the product will open and the app will allow us to add the item to our order.
We will see a photograph of the product, the details of the price, taxes and description of the product, just as the business owner has prepared his catalog.
In addition, there is an editable field “Comments” in which we can ask questions or request clarification about the product and our purchase.
Click on “Add to order” and we will add our first product to our first order.
1.4 Order payments info screen
On this screen, the first and most important notice is about payments and the use of the app: Payments and money transfers are a service provided by companies that are independent from ‘My Favourite Shop’. Please remember to only make payments/reservations to businesses and people that you know for certain. Once again, please remember that we do not guarantee the existence or accuracy of the offers that appear in the application.
Next, you will need to accept the purchase Terms and Conditions of the business where you wish to buy/reserve. These are the particular conditions set by each business owner and will clarify details such as whether the business offers or not shipping, its return policy, what the reservation implies in terms of time and guarantee, the commitments that both parties agree to, and other particularities of your purchase from that business.
The ‘To make Payments’ field will inform you how to make payments for your orders to the selected business: a phone number for Cash App, Venmo, Zelle, or any of the most common methods for receiving payments via mobile phone or email.
Finally, if the business allows reservations, it will display the percentage that needs to be paid to reserve and the amount calculated for your current order. As we have previously mentioned, the reservation and payment terms will have been explained in the owner’s ‘Terms and Conditions’.
In our orders we can see the name of the local business and the amount of the order in the navigation bar, the items that are part of the order and the possibility of adding more items or services by pressing ![]() or removing from the order by pressing
or removing from the order by pressing ![]() . If the selected business has payments/reservations enabled, the “
. If the selected business has payments/reservations enabled, the “![]() PAYMENTS” button will show us the instructions to make reservations and payments through the app.
PAYMENTS” button will show us the instructions to make reservations and payments through the app.
Let’s add another product and see an example of Payments Screen.


1.5 Send the order
Making the payment is a different operation that is external to the ‘My Favourite Shop POS’. When the business owner receives the order, they may contact you by email or through the phone number provided in the ‘Fiscal Data’ tab. The transfer of the money for the order will depend on the app used and the particular conditions of the service.
Press “![]() Send” button and a message with your order will be sent through the app to the business owner and the order will appear in the “Orders” tab.
Send” button and a message with your order will be sent through the app to the business owner and the order will appear in the “Orders” tab.
Orders
2.1 Orders tab
Here we will see a list of our orders.
The list serves as a record of our orders in the app, and with a simple click on any order, we can view its details.
The list serves as a record of our orders in the app, and with a simple click on any order, we can view its details.
You can also retrieve the data provided by the seller for the payment if you need to recover it for any reason.
Fiscal Data
3.1 Fiscal Data tab
In this tab On this screen, you can fill in your billing and contact information. If you need an invoice, any business you interact with may communicate with you through this information and send you legal invoices automatically to your email. Make sure to fill them in correctly.
And that’s it! We hope you enjoy the app, and thank you for your trust.
BUSINESS OWNERS quick guide Share images guide Google Play Download